
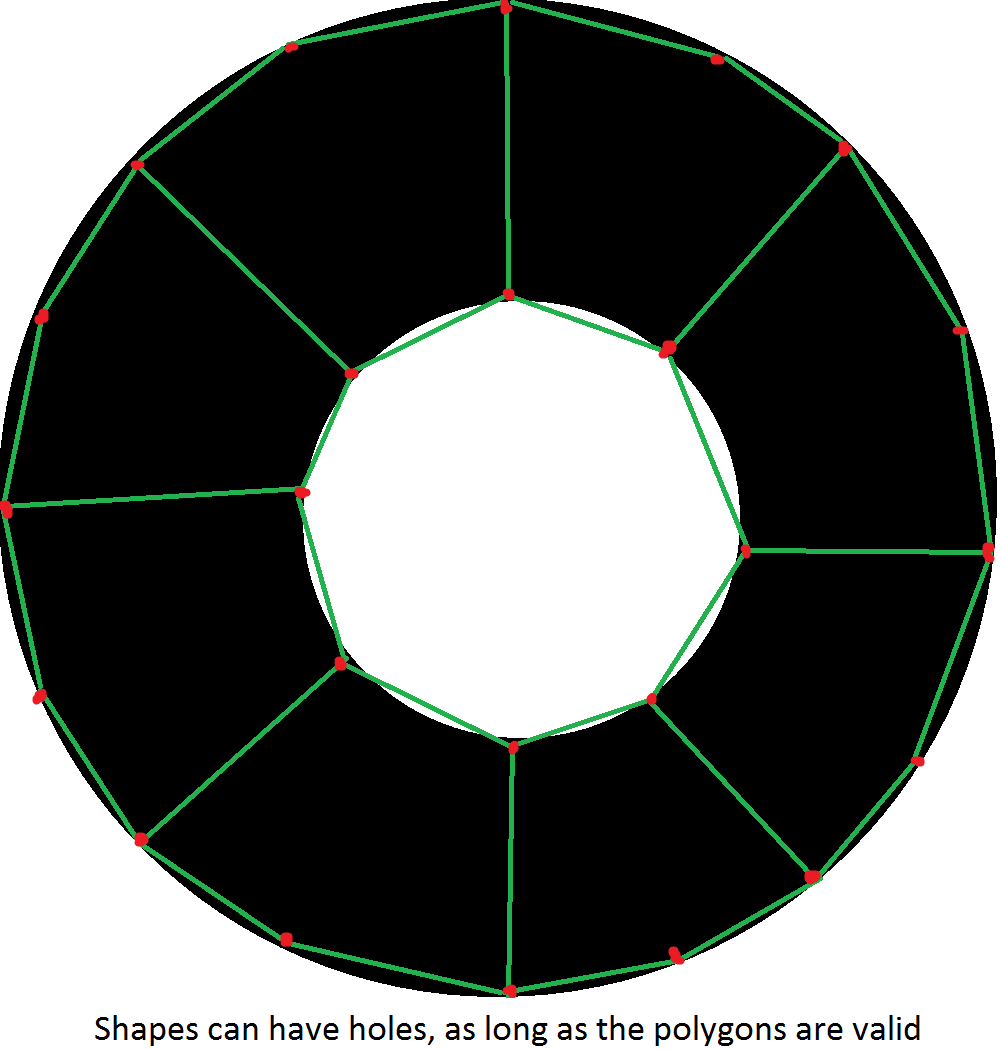
Custom collision shapes allow you to use a shape other than a rectangle or circle to define how actors collide with each other. Custom collision shapes consist of one or more convex polygons, each consisting of 3-8 vertices.

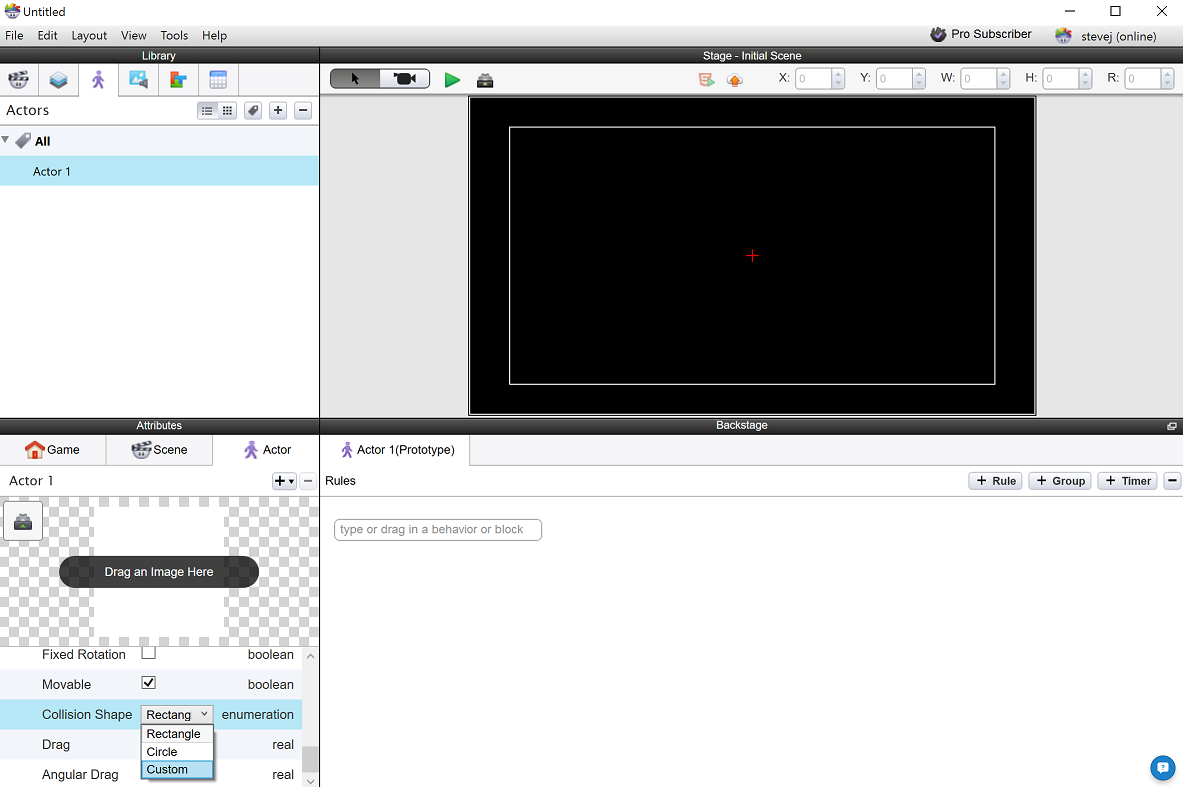
To assign a custom collision shape to an actor, select the Physics->Collision Shape option “Custom”. You will be asked to select the file containing the collision data you want for your actor..

NOTE 1: after you import the data, the file will no longer be needed; the data will be merged into your game files.
NOTE 2: if you need to re-import the vertex data, select rectangle or circle as a collision shape, and then custom again.
The data file is in JSON format, with the following layout:
- array labeled “rigidBodies”, with each element being an object:
- optional boolean flag “normalized”: flag that the polygon vertex values fall in the range 0->1. Default value is true.
- optional object “size”, consisting of a “width” and “height” value. If “normalized” is false, this contains the width and height of the image. Not needed if “normalized” is true.
- optional boolean flag “rescale”. If “normalized” is true, set to true if the image isn’t square, false otherwise. Default value is true. Not needed if “normalized” is false.
- each object contains an array “polygons”
- each element in the array is an array of objects with the vertex data
- each vertex object contains an “x” and “y” floating point value
Example 1: an object containing 1 normalized polygon consisting of 3 vertices at (0, 0), (1, 0), and (0.5, 1):
{
"rigidBodies": [
{
"rescale":false,
"polygons": [
[
{ "x": 0, "y": 0 },
{ "x": 1, "y": 0 },
{ "x": 0.5, "y": 1 }
]]}
]}
Example 2: an object of size (100, 100), containing 1 unnormalized polygon consisting of 3 vertexes at (0,0), (100, 0), and (50, 100)
{
"rigidBodies": [
{
"normalized":false,
"size":{"width:100, "height":100},
"polygons": [
[
{ "x": 0, "y": 0 },
{ "x": 100, "y": 0 },
{ "x": 50, "y": 100 }
]]}
]}
The vertex data can be created 3rd party tools. Currently we support Physics Body Editor, and PhysicsEditor.
Physics Body Editor advantages/disadvantages:
- Good: Free
- Good: No plugin required.
- Good: Can make objects with holes.
- Bad: Requires Java (java 1.6 for Mac users)
- Bad: Does not appear to be maintained any more.
- Bad: Wonky interface.
PhysicsEditor advantages/disadvantages:
- Good: Is still currently being worked on by its developers.
- Good: Standalone product (no Java needed).
- Good: Clean interface.
- Bad: Costs money.
- Bad: Requires an exporter to be used with GameSalad (see link below to get it).
- Bad: Only makes solid shapes (no holes).
Using Physics Body Editor
Note for Mac users: On Mac, Physics Body Editor requires Java 1.6. Use this link to download the Physics Body Editor and Java 1.6 combined.
To use Physics Body Editor to create a collision shape data for to import in GameSalad Creator, run the program, and:
- Select “New project”. You will need one project for each actor that you want to create a collision shape file for. We suggest giving the project name the extension “.json”.
- Under the Rigid bodies tab, select “New”, and click “Create body from image”. Select the image you are using for your actor.
- You should see your image filling a box with the range of 0->1 on the x and y axes.
- Add vertices by clicking on your image with the left mouse button, and finish adding them by clicking on the first vertex created. The program will automatically determine the polygon data based on the vertices you have added.
- You can also have the program try to create vertices for you by clicking the “Auto-trace” button.
- You can edit vertices by clicking to the left of the “Creation” button on the left so that the “Edition” button pops out. Vertices can by moved around with the mouse, or deleted with the delete/backspace key.
- Save the data by clicking the save button.
Note 1: “Dynamic Objects” functions in the tool are not used by GameSalad.
Note 2: Although more than one image/rigid body can be imported into the tool for a project, only the first object’s data will be imported into GameSalad Creator. You will need to create a separate project file for each actor you want collision data for.
Using PhysicsEditor
PhysicsEditor requires a plugin to save your data for GameSalad. Link: PhysicsEditorGameSaladExporter
- Extract the plugin zip file to a directory of your choice. Make sure the directory has nothing else in it except the “gamesalad” plugin directory.
- Run PhysicsEditor, open preferences, and set the “Custom exporter directory” to the folder “gamesalad” is in.
- Restart the program, and set the “Exporter” to “GameSalad”.
- Click the “Add sprites” button to load your actor’s image.
- Click on the “magic wand” icon to auto-trace your image.
- Clean up the collision shape by deleting/adjusting the vertex points.
- Click the “publish” button. Make sure the file to save to has the extension “.json”.