
For developers new to GameSalad Creator, publishing refers to the act of taking your project file and turning it into an .app (Mac Desktop, iPhone, or iPad game), a signed and unsigned .apk (Android publishing, which is a feature available to PRO users), or a GameSalad Arcade/HTML5 game that is playable at http://arcade.gamesalad.com/arcade
For iOS and Android publishes, the resulting file can then be used to install your game onto a mobile device (such as an iPhone or Kindle Fire) so you can test your game in the most authentic environment available (also known as ad-hoc testing).
If you’d like to follow along with this guide as we go but don’t have a project file you’re ready to publish with, don’t worry! Simply open up one of the template project files in the ‘Create a New Project’ column of the new dashboard and use that project to go through publishing process with.
We won’t be making any edits to the project file itself, and instead we’ll head directly into the new Web Publishing process by using the ‘Publish’ button in the upper right-hand corner of the Mac Creator window.

Note: If you use a template project (or any new/unsaved project file) to go through the publishing process, it will first prompt you to save the project file, before allowing you to continue on.
This will now launch your default web browser, which attempt to the first step in the new Web Publishing process: Asking you whether you want to create a new game in your portfolio or update an existing game.

For this walkthrough, we’ll be selecting ‘Create New Game’.
After selecting ‘Create New Game’, you’ll see the following screen. Select the Android platform (this will add it to the list of platforms on the left for this project).
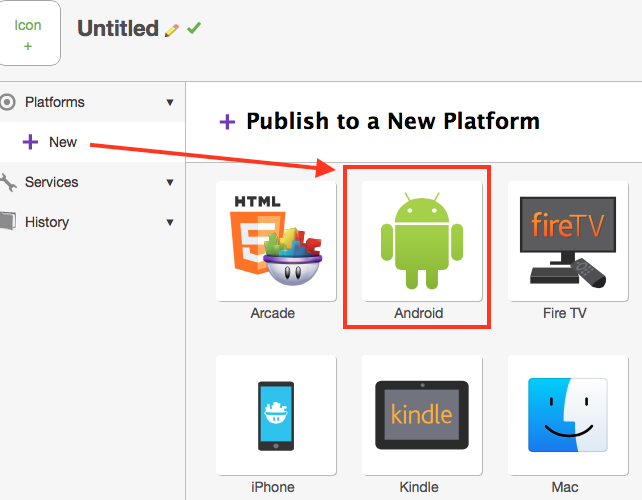
Select the Android platform that popped up on the left.

The primary Web Publishing user interface is divided into three sections: The top header and the left-hand column, with the rest of the window’s space used to show various settings, info, and configuration options.
The top header is where you’ll be able to set the title of your game (be sure to select ‘save’ after you change this!) and upload an icon.
In the left-hand column you’ll see several top-level categories, including: Platforms, Services, and History. Depending on which item you select from this column, the area to the right of the column will change to show different options and information.
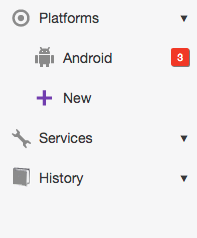
The red-boxed numbers indicate the number of remaining notifications left for each particular platform.
Mousing over the various book/question mark icons found throughout the Web Publishing process will trigger helpful and informative tool-tips to appear.
Android
Sections required for publishing:
- Icon
- Android Package Name
- Display Name
- Android Version Code
- Publicly Visible Version
Optional sections:
- Hardware
- Touchscreen
- Custom Loading Image
Additional requirements:
You’ll need to install and set up the Android SDK Tools onto your computer. More information on this process can be found in our cookbook article on this topic.
In addition, you’ll need to have a valid Keystore ready to supply for Android publishing. If you don’t already have one, you can find steps for Keystore creation in our cookbook article on this topic.
Once the above prerequisites have been fulfilled, use the ‘Generate APK’ button, then the ‘Sign APK’ button to start the signing process. This may bring up the Launch Application prompt. If it does, simply select GameSalad Creator, since this is where the signing process occurs.

Once the app has been signed, choose where you would like to save the file.