Google Play Developer Console
This section assumes you will be uploading a new application to Google. However, if you are updating an existing app that’s already on Google Play, you can skip to step 5. The purpose of this section is to get as much done in the Developer Console as possible before publishing to remove the need to re-upload your APK for testing purposes.
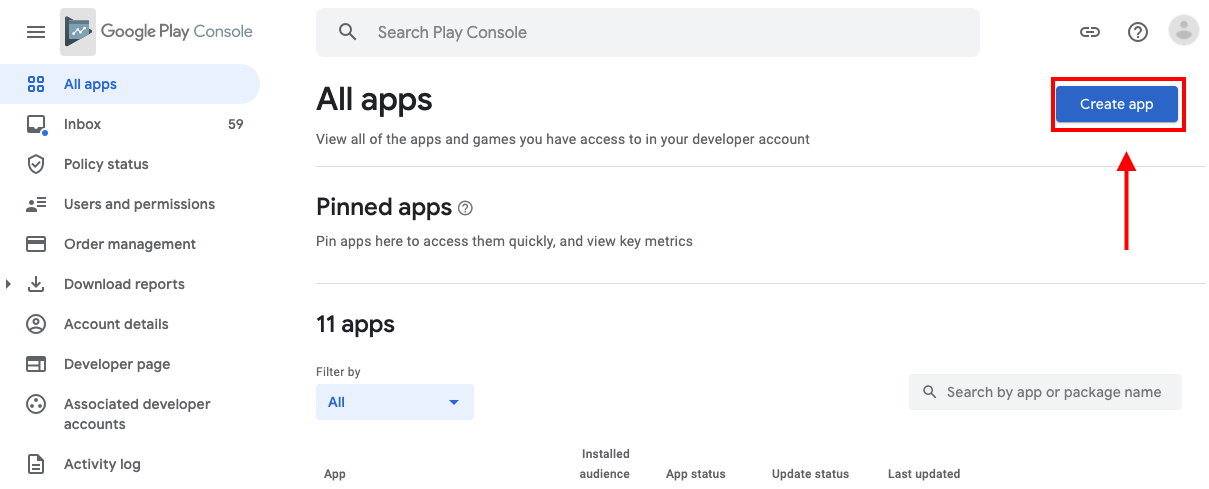
- Log into the Google Play Developer Console from the Google account you use to publish apps to the Google Play store. If you don’t have one, you will need to set one up. https://play.google.com/apps/publish/
- Click on ‘Create App‘
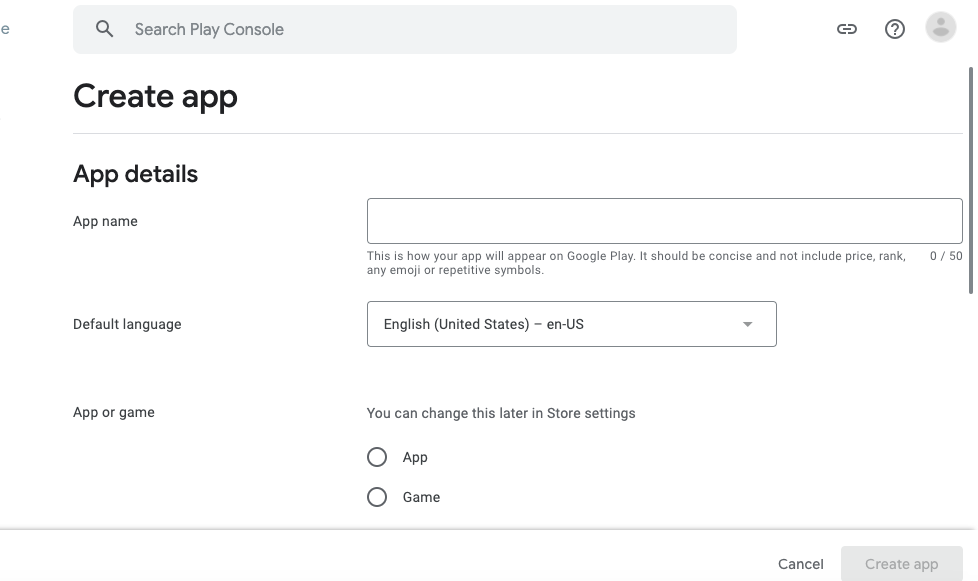
- Fill out the App Details page
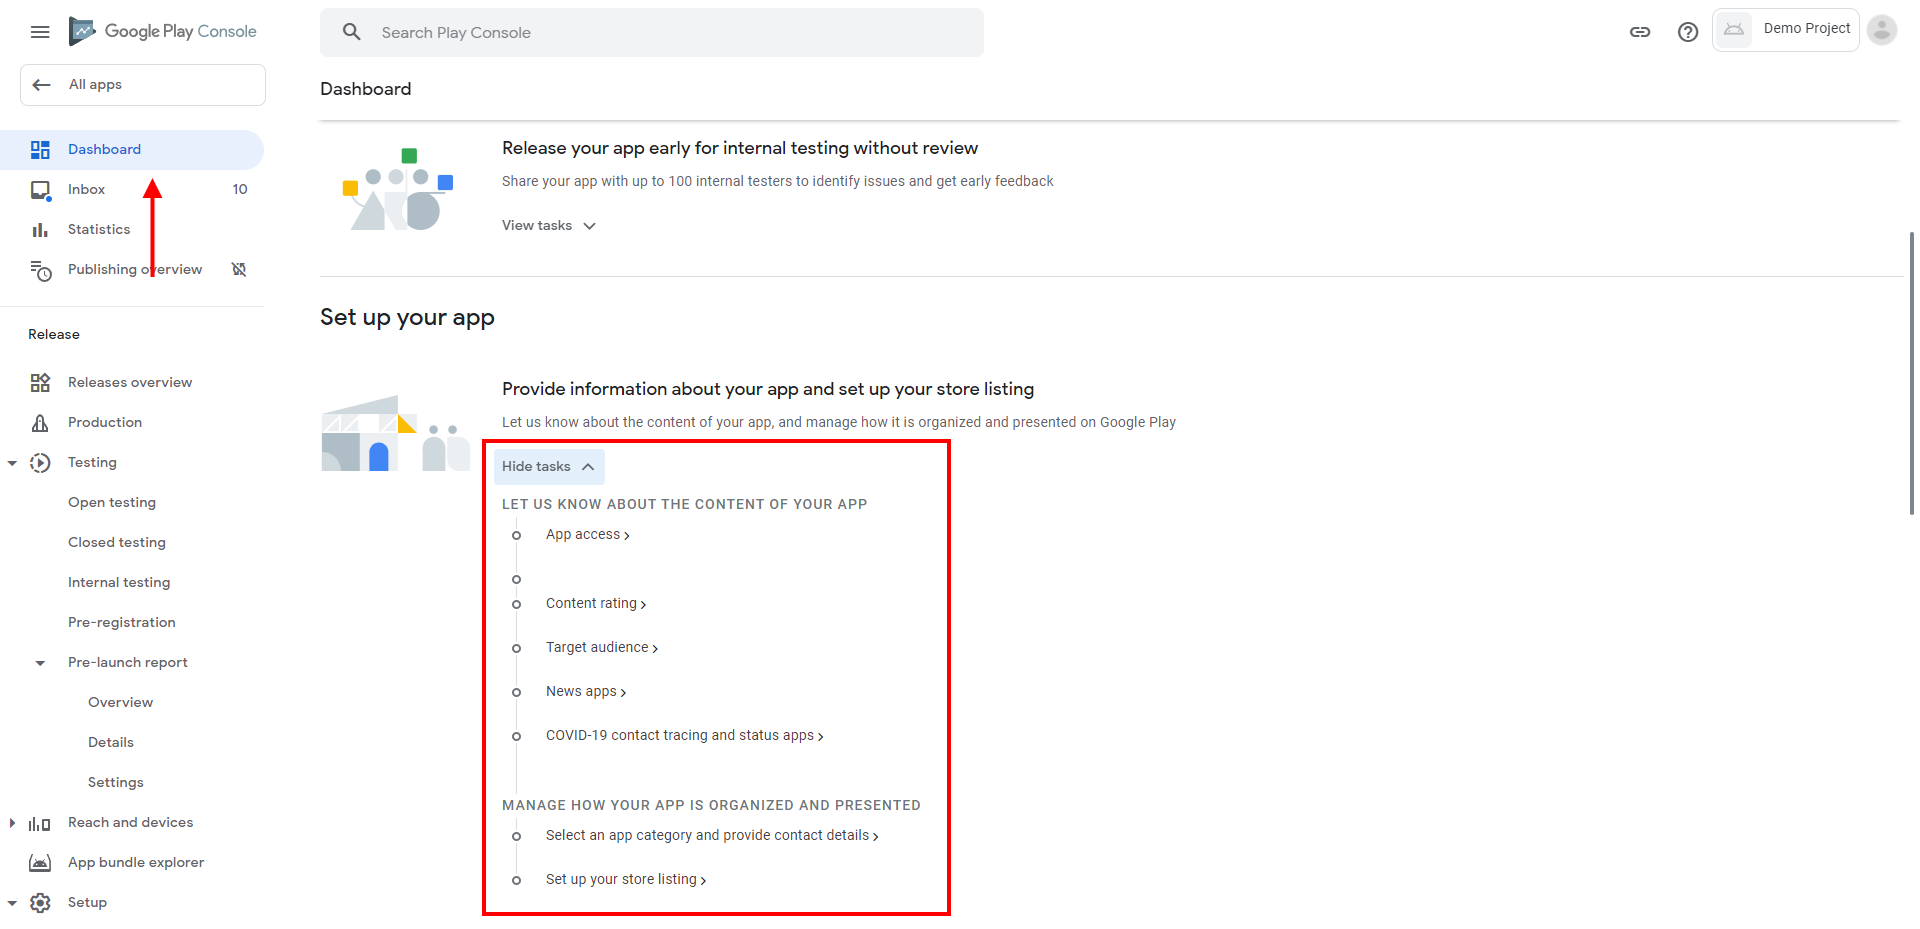
- Fill out the required details for your app. The list of forms to fill out can be found under the Dashboard tab, in the Set up your app section (you may need to click on a dropdown to expand the list of tasks).
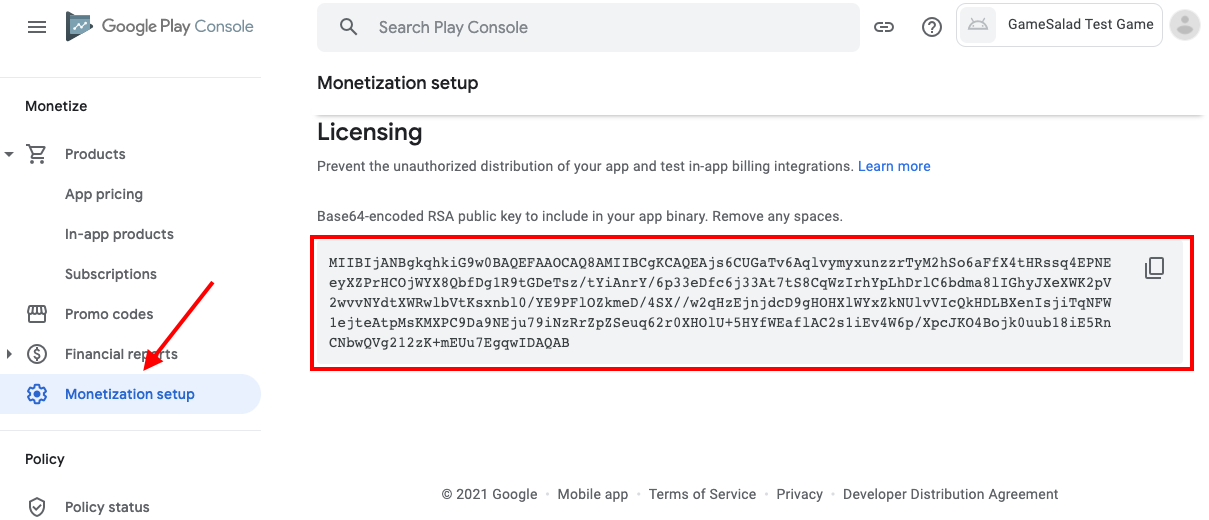
- From the ‘Monetization setup‘ page, copy the License Key. We will be using this in Web Publishing. This is what validates your app to use these services.
Once you have the License Key, you need to set up your IAPs in Creator. You’ll be coming back to the Developer Console after making the APK in Web Publishing.
Setting Up IAP In Creator
Before publishing your game, you’ll need to set up your in-app purchases in Creator. This is done through the PurchaseTable and the IAP behaviors.
PURCHASE TABLE AND PRODUCT ID’S
In the PurchaseTable you only fill in information for the first two columns, the id of each purchase you want to have in the app and the toggle for whether or not that purchase is consumable. The rest of the table is filled in from the IAP Request Purchase Data behavior after the app is linked to the store later.
One difference between Google and the other IAP providers (iOS and Amazon) with regards to setting up in-app purchases is that the Product IDs for Google IAP can’t use capital letters.
Also, Product IDs are not case-friendly (meaning “bowlboyconsumable” is not the same as “BowlBoyConsumable”) so you will need to keep this in mind if you plan on making a multiplatform app.
IN APP PURCHASE BEHAVIORS
There are 4 in app purchase behaviors in GameSalad that you will use to create the purchase functionality in your project:
- In App Purchase – Request Purchase Data: This behavior sends a request to the store to get the purchase data for each of the ID’s you have set up. This needs to run before any of the other IAP behaviors can work properly.
- In App Purchase – Buy Item: This behavior sends a purchase request to the store for the ID specified in the behavior. Column 5 of the Purchase Table updates with the purchase state, and can be referenced to tell if the purchase is successful, pending, failed, etc.
- In App Purchase – Consume Item: This behavior is for repeatable IAP’s, and should be used after rewarding a successful purchase of a consumable item so that it can be purchased again.
- In App Purchase – Restore Items: This behavior sends a request to the store to restore any non-consumable purchases made in the app, and is typically put in a button on the store or main menu of your app.
SAMPLE PROJECT
A sample project for IAP logic can be downloaded from this Dropbox URL: https://www.dropbox.com/s/4jtmof9jarbae0b/InAppPurchaseBasics.zip?dl=0
Once your project is ready, publish it to your GameSalad portfolio using the publish button across the top of the GameSalad interface.
Services
From your GameSalad portfolio page (accessible from https://publish.gamesalad.com), there’s a Services dropdown on the left hand side of the page. Expand that dropdown and select ‘Google’. This is where you put your License Key from the Google Play Developer Console. Simply copy and paste it into the field and click outside the field to allow it to save.

Android Target
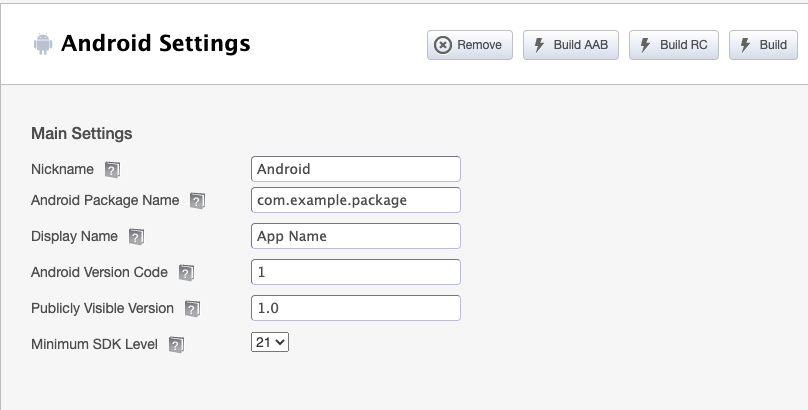
On the Android publishing target page, make sure to use the Package Name you plan on using once it goes live. This cannot be changed once you upload it to Google Play without making a new application and you will not be able to use a previous package name.
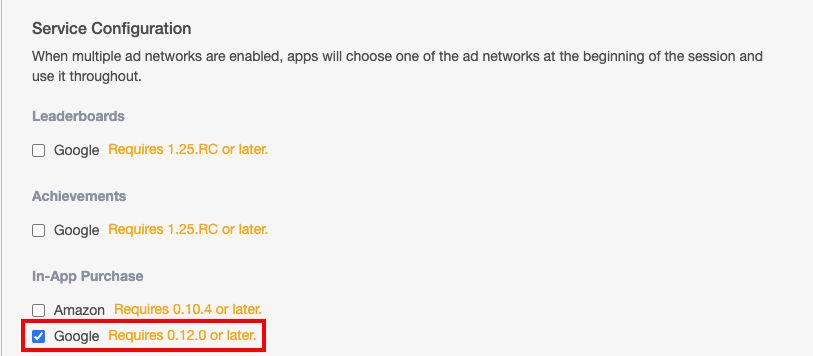
You will also need to check ‘Google‘ under In-App Purchases in the Service Configuration section near the bottom of the page.
Generate and Sign the AAB file. Once you have your signed AAB file, you’ll need to go back to the Google Play Developer Console to upload it to the store.
Upload AAB as an Alpha
Now that you have the AAB, it’s time to upload it to the Google Play Developer Console as an Alpha Build so you can test your IAP items before they go live.
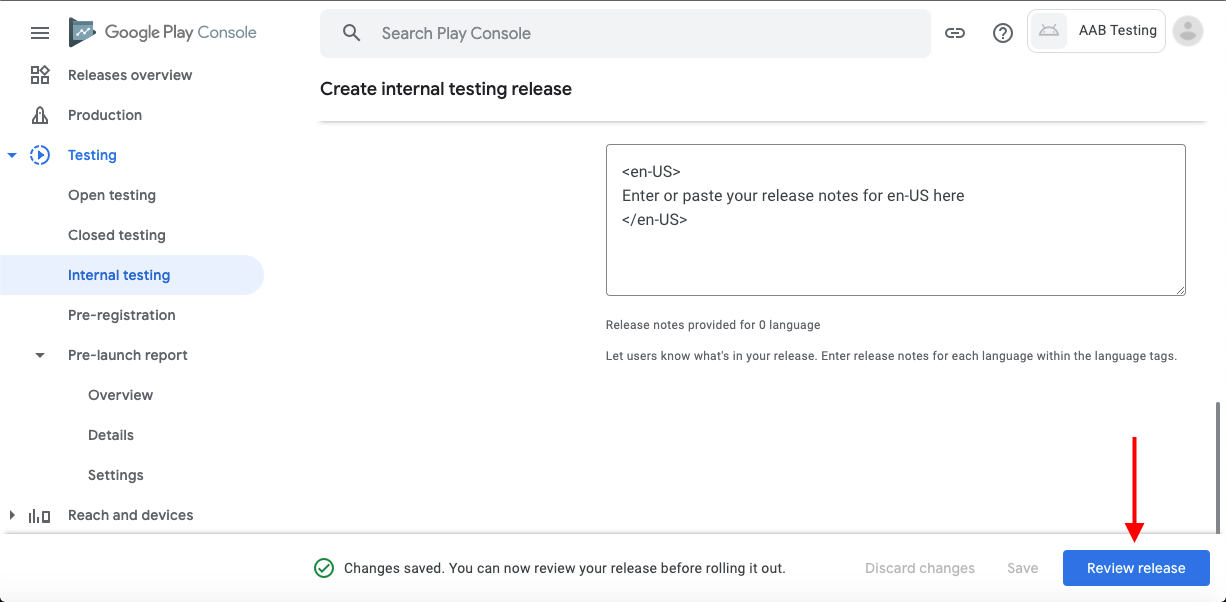
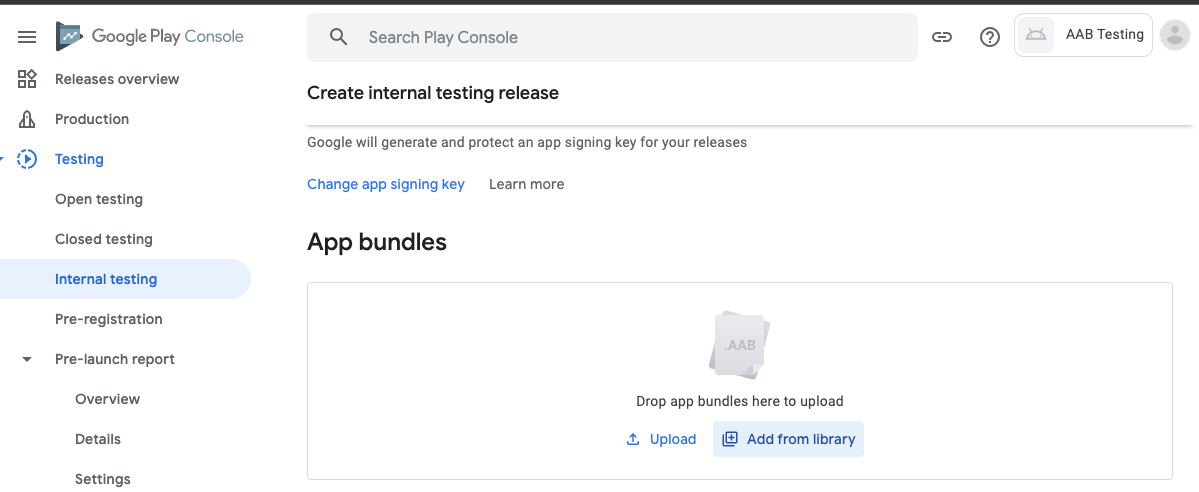
- From the Application’s main page, click on Testing -> Internal Testing
- Click on the ‘Create new release’ button

- Upload the signed .aab file

With the AAB uploaded, you can now set up the In-App Purchases in the Google Play Developer Console.
NOTE: Uploads to the Google Play store can take a while before they are available (anywhere from 3-5 hours). However, this does not prevent you from setting up the app’s In-App Purchases, so let’s do that now…
Setting up In-App Purchases in the Google Play Developer Console
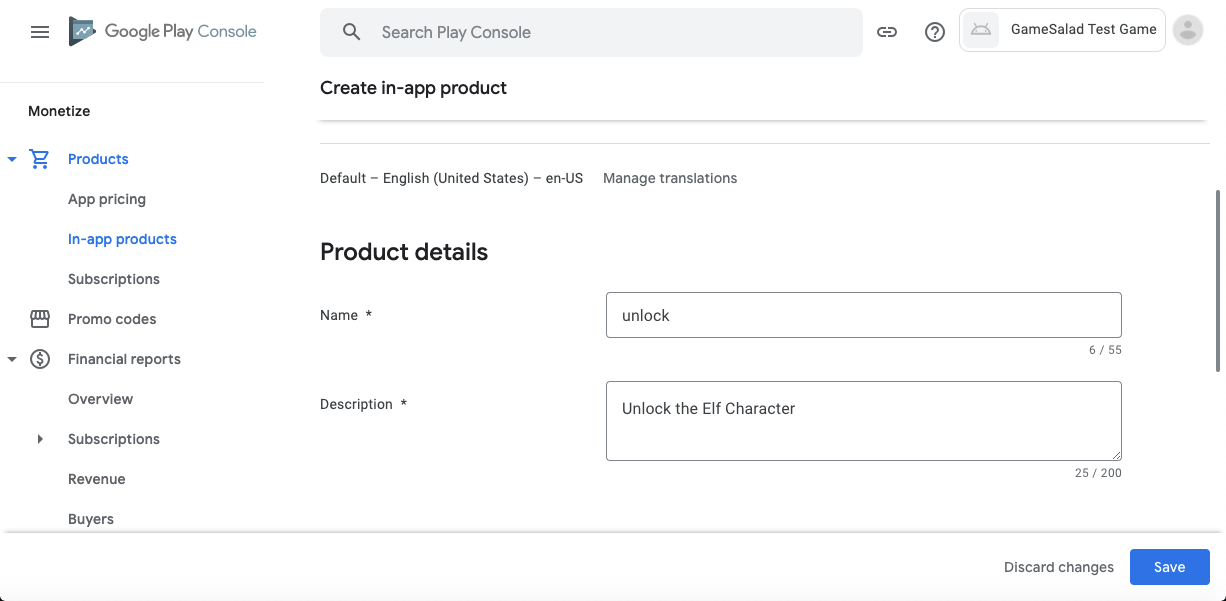
- Click on ‘In-App Products‘ from the application’s main left side menu, under the Monetize heading
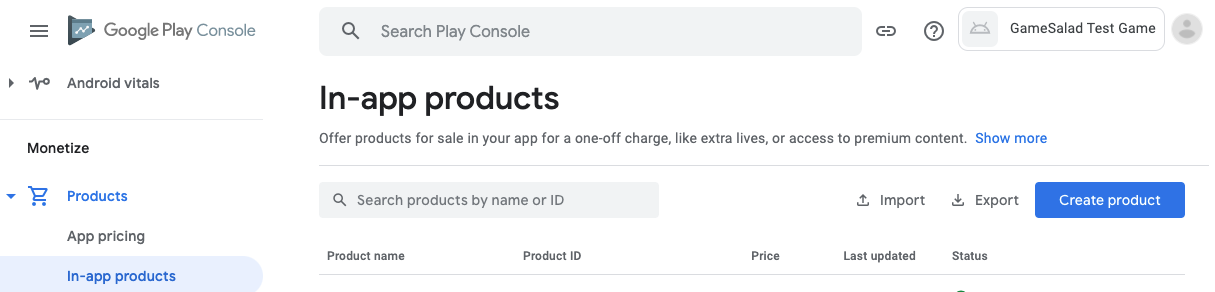
- Click on the ‘Create product‘ button to make a new IAP
- Enter in the Product ID of one of your IAP items (the same as what you used in the PurchaseTable of your GameSalad project)
- Fill out the Name, Description and Pricing for this item and then click ‘Save‘. NOTE: Google IAPs are not defined as ‘Consumable or Non-Consumable’ as the transaction information is handled by Google Play
- Enter in the Product ID of one of your IAP items (the same as what you used in the PurchaseTable in your gameproj) , make sure you clicked on ‘Managed product‘ and then click ‘Continue‘
- Fill out the Managed Product Details, Price, and Title for this item and then click ‘Save‘.
- Once saved, activate the IAP item by clicking the ‘Activate’ button in the bottom right corner when viewing the IAP item.
- Repeat steps 2-7 for the rest of your IAP items
You may have noticed that you don’t explicitly set your items as Consumable or Non-Consumable in the Google Play Developer Console. This is handled by your app instead through the PurchaseTable and IAP behaviors.
Once your IAP items are activated, it’s time to test the app.
Testing Google IAP’s
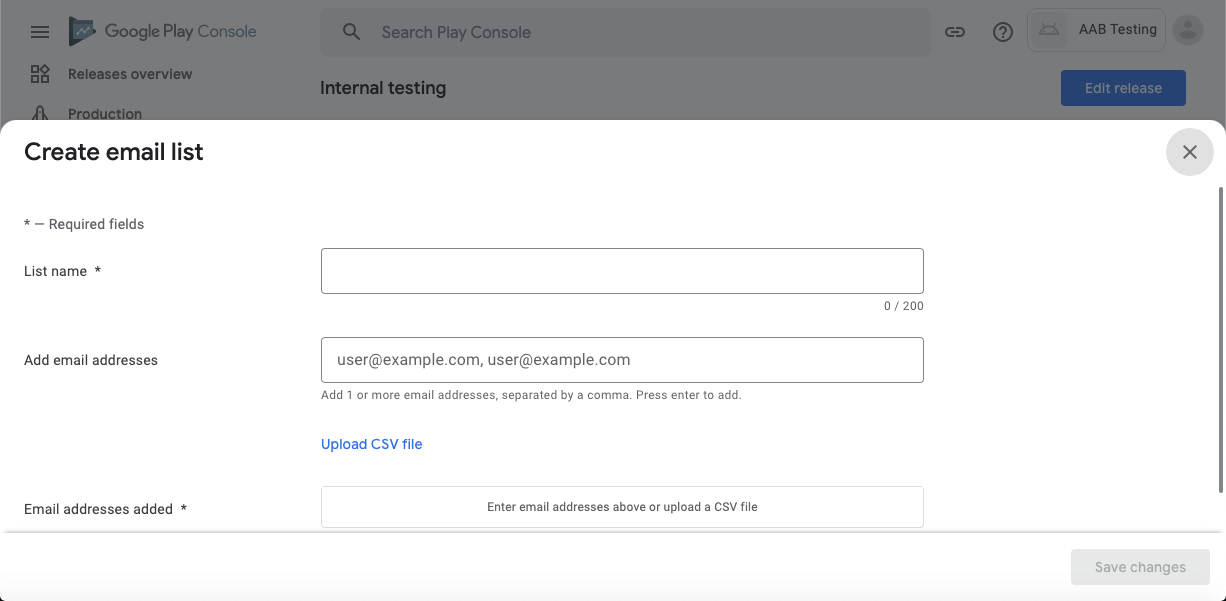
- From the Google Play Developer Console left hand menu, click ‘Internal Testing‘ and follow the prompt to add testers, or click the Testers tab and enter the emails of the person(s) who will be testing.
NOTE: The testers will be required to open the testing invitation email on the Android device that has their Play Store account linked in order to complete the confirmation process.
- Add the .aab file to the test process by clicking on the ‘Add from library’ button if you have already uploaded the .aab file from the previous steps, or ‘Upload’ if it’s a new .aab file.
- Hit ‘Review Release’ once the upload is complete, and finally ‘Start Rollout to Internal Testing’. If Review release is grayed out, you may need to save the changes first via the save button.