
Overview:
Google Play Games Services are similar to Apple’s GameCenter or Amazon’s (now deprecated) Game Circle. User can create Leaderboards and Achievements which create a layer of engagement for your games.
First order of business is to have the appropriate behaviors in your GameSalad game project. You can simultaneously use Google and Apple features in your app. Behaviors that are intended for Apple, will not trigger in your Android .apk and the same applies to behaviors intended for Android that are triggered on an Apple device. Our engine is designed to gracefully ignore behaviors on platforms that do not support that behavior.
Behaviors:
‘Platforms’ behaviors are intended for all platforms supporting the behavior. For example, the ‘Platform – Login’ behavior will log you into Google Play Games or GameCenter depending on what platform the behavior is triggered on.
Set up your App and start configuring Game Services:
Once you are registered with the Google Play store as a developer you can begin adding your app data. To save some time, we will assume that you have already uploaded a game through the “Create Application” flow. You will need to upload a placeholder APK before you start configuring Game Services. You will also need to make sure the APK is signed with your same certificate you indent to use for the final game and has the same final package name you intend to use. Both of these items will be taken into account when a user tries to “Log In” to your app and must be correct.
Step 1. Create game in “Game services”.
Game Services lets you manage a “Game”, which has its own description and holds a set of leaderboards and achievements. This flexibility allows you to attach multiple apps to the same “Game”. For instance, if you have different Tablet and Phone APKs for your game distributed as different apps (e.g. “My Awesome Game” and “My Awesome Game XL”) they can still share the same leaderboards and achievements. This configuration is also the listing for your game in the Google Play Games app, which is almost like a separate app store for discovering games in the Android ecosystem.
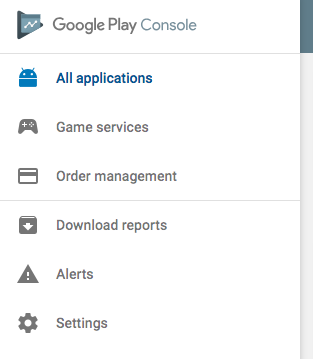
First go to the Game Services console by clicking “Game services” on the left menu of your Google Play Console.
Next, click on “ADD NEW GAME”:

In the modal dialog box that pops up, stay with the “I don’t use any Google APIs in my game yet” options and enter a name for your game. It should be something common between all Apps that will share this game configuration. Remember, this will also be seen as your Game’s listing in the Google Play Games app, so treat it as you would your Google Play store listing.
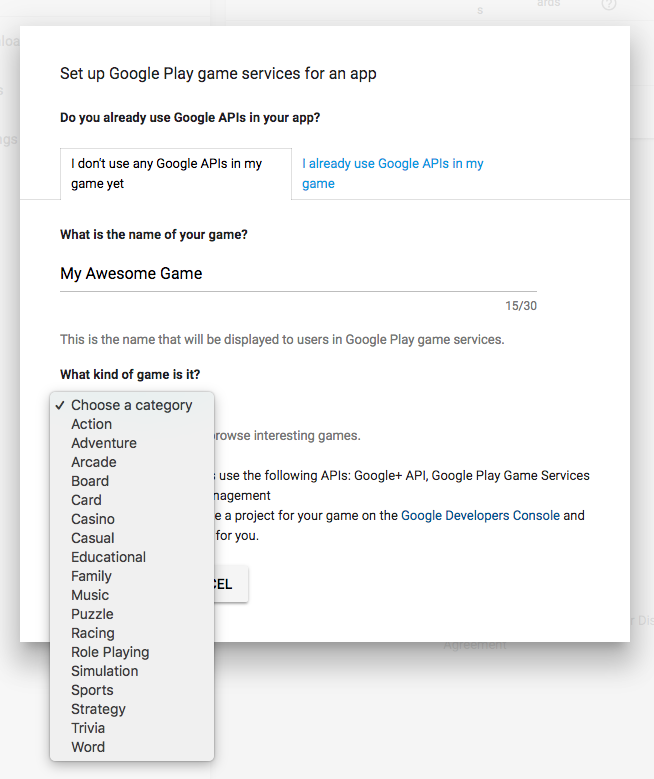
Choose the category for your game and hit Create. After you are done you will be taken to the Game details interface. Which takes us to…
Step 2: Linking your app.
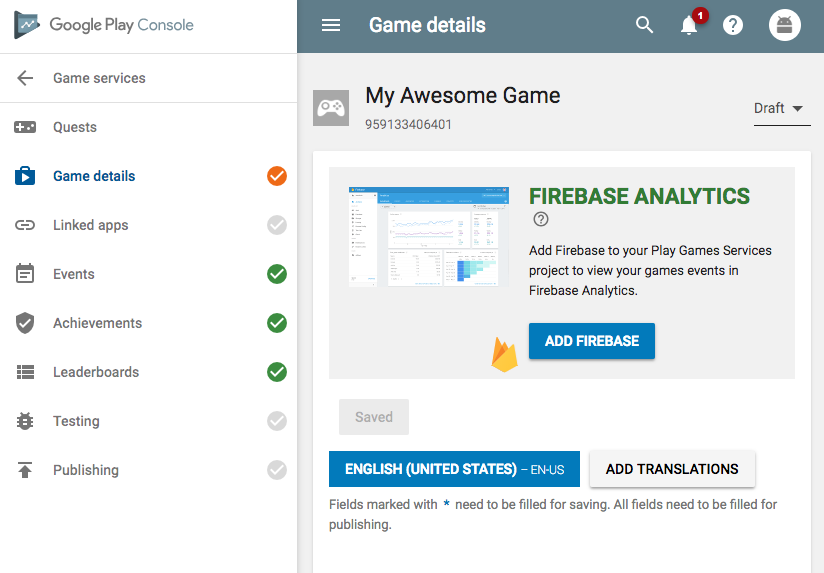
You just created your game, this is what you will see:
Click on “Linked Apps” and choose “Android”. You will then your Linked apps configuration form:

Click on package name field and type in the package id for your app (e.g. com.gamesalad.myawesomegame).
Head back up to the top and click “Save and continue”. You will then be asked to Authorize your app. This created a “Client ID” which is used to link your “Google Play” App to this “Google Play Games” Game. If you are sure have signed your placeholder app with the correct keystore, then you can skip down to Click on “Authorize Your App Now.
This bit is going to get a bit technical. Google Play Games is about to create a “Client ID”. When creating the client ID it will need to know the SHA-1 fingerprint of your keystore. So, assuming you have installed the Android SDK, you will need to drop into a command line interface and type the following:
keytool -list -v -keystore {keystore name} -alias {alias name}
example:
keytool -list -v -keystore ~/gamesalad-dev.keystore -alias gamesalad
Enter keystore password:
Alias name: gamesalad
Creation date: Oct 16, 2018
Entry type: PrivateKeyEntry
Certificate chain length: 1
Certificate[1]:
Owner: CN=GameSalad Bowlboy, OU=Engineering, O="GameSalad, Inc.", L=Austin, ST=TX, C=US
Issuer: CN=GameSalad Bowlboy, OU=Engineering, O="GameSalad, Inc.", L=Austin, ST=TX, C=US
Serial number: 445fe86e
Valid from: Tue Oct 16 16:23:43 CDT 2018 until: Sat Mar 03 15:23:43 CST 2046
Certificate fingerprints:
MD5:ES:5A:B2:E1:62:20:E0:CB:C7:07:54:4L:07:F3:0E:DB
SHA1: FE:FT:C7:23:3A:76:6C:95:23:06:AL:D4:11:L8:B4:F6:18:A3:80:40
SHA256: 1D:1E:EF:AD:C5:8C:52:C6:47:59:AZ:C7:D2:C4:AD:8E:A8:BD:3C:81:F9:8E:86:01:11:58:57:C8:46:56:73:5F
There’s a bit more there (and I changed this example up, so don’t go trying to use this example for anything useful).
Take note of the SHA1 line. Keep the terminal in view or copy paste it somewhere you can look at later.
Now let’s head back to the Google Play Console page…
Click on “Authorize Your App Now”
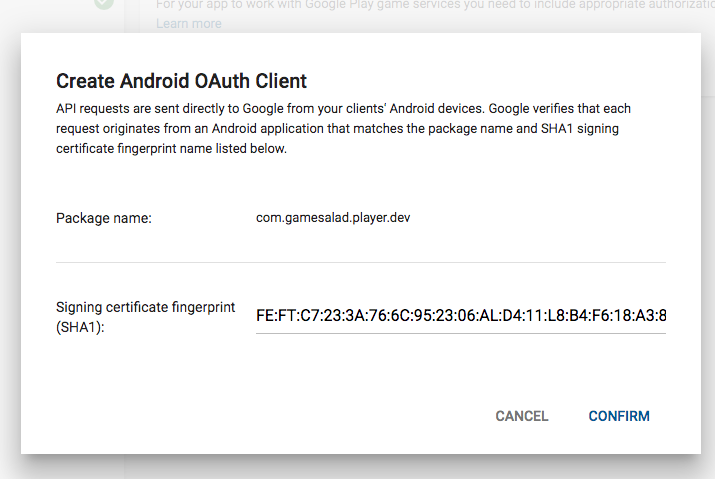
The “Signing certificate fingerprint (SHA1):” should match the SHA1 line of the keytool output above.
If you don’t know what we’re talking about because you skipped ahead and you’re confident you used the right key to sign your APK, just assume its’ right.
Now press “Confirm”

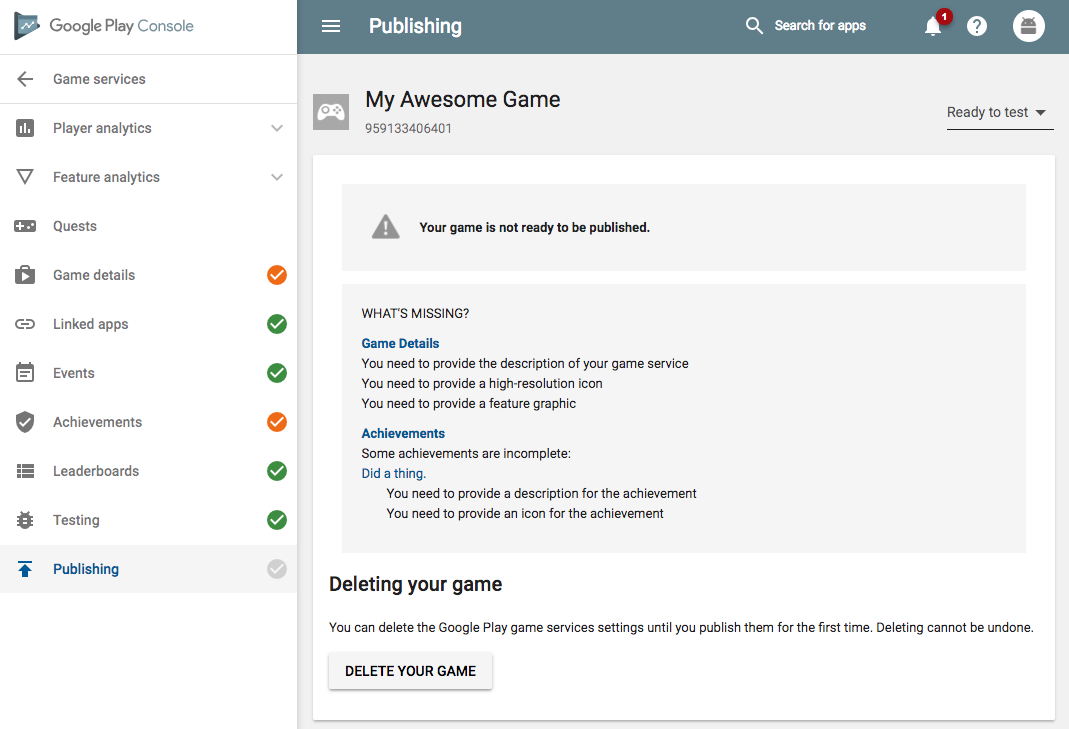
If you read carefully it says: You only need to include the application ID (#######) in your Android app.
Yep, that’s the first bit of configuration you’ll need, so keep that number somewhere. You can always get it later since it’s right there under your Game’s name. Look under My Awesome Game at the top of the picture. The same number is right there!
Step 3: Create Achievements for your game
Achievements let you reward your players for achieving certain milestones in a game. They are a good way to keep users engaged in games as they keep users coming back in order to unlock and “collect” all of the achievements your game has to offer. They can also help build anticipation in your game as the name of the achievement could hint at things to come later in the game.
Google Play Games lets you have two types of achievements. Standard achievements and Incremental achievements.
Standard achievements can be thought of as simple “Unlockable” achievements that have a single On / Off state. Things like finishing each level in your game, beating a boss for the first time are good candidates for standard achievements.
Incremental achievements require multiple steps to unlock. Things like “Catch 100 Fish” or “Unlock 3 Stars on Level 1”. For incremental achievements you can show the user progress towards a given achievement.
So let’s click on the “Achievements” menu item on the left of the screen and the click “Add Achievement”

You will be taken to an achievement form. If you’re still developing or just testing all you need is the Name, whether the achievement is Incremental, and a number of steps if it is incremental.
After configuring these options, click “Save”. Next time you can click “Save and Add Another Achievement”, but for now just click “Save” because you will then see:
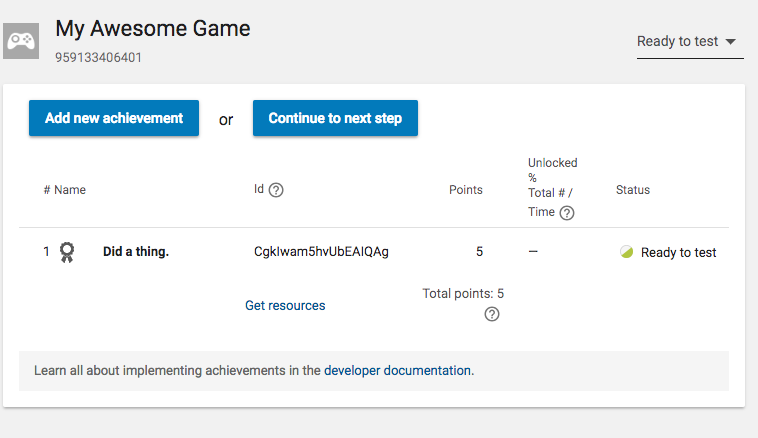
This interface shows a list of your Achievements. Note that each achievement will have an ID. This ID is what you will use in the “Platform – Update Achievement” behavior in your game. For example:
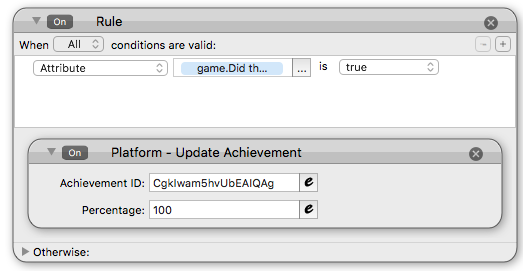
For Standard achievements, you can set the Percentage to 100. For Incremental achievements, you will need to input the percentage value that represents the number of steps taken. So if you have 5 steps in your achievement and your player has finished 2 of the steps, you will need to send 40 as your Percentage value in your behavior.
Repeat these setup steps for every achievement you want in your game.
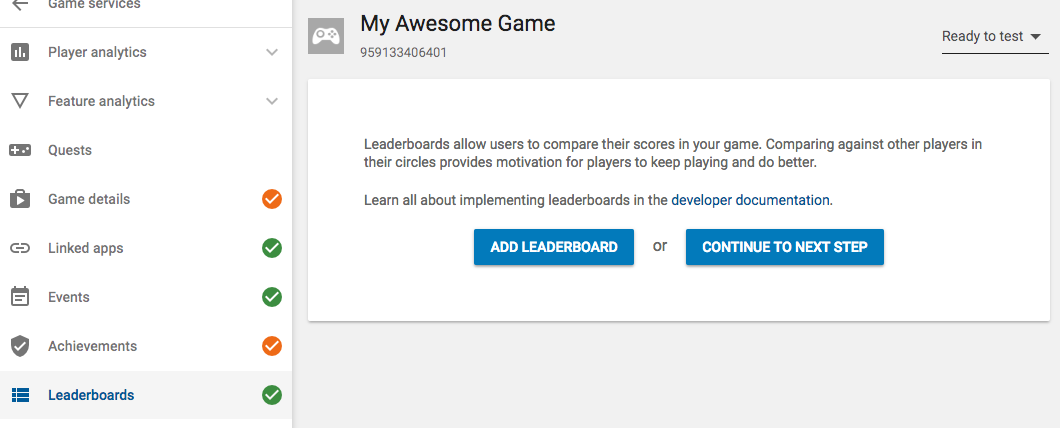
Step 4: Create your Leaderboards
Leaderboards let you add some competition to your games be letting players complete with other players around the world to get the highest score in your game. It’s a great way to get people coming back to your game.
Click on the “Leaderboards” menu item on your Game configuration and then click “Add Leaderboard”
You will see the Leaderboard setup form. For now you will only need to set the Name, but we also suggest you take a look at “Score formatting” and “Ordering”.
Score formatting is something that happens on the display side. GameSalad stores and submits scores as a Java long integer (i.e. long integers can be really big integers). You can then format your scores using “Score formatting”.
From Google’s Documentation:
Ordering is important depending on the type of score you are comparing. For instance, “Time” based scores usually value the Smallest value as the best (Smaller is Better). Points based scores usually value the Largest score (Larger is Better).
Choose the options that work the best for this leaderboard and click “Save”

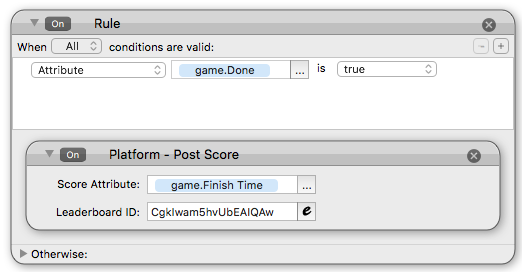
Again, take not of the Id column. You will need this ID when you submit scores for the user. Using the “Platform – Post Score” behavior, like so:
Step 4: Add test accounts
Before you publish your game, you’re going to want to test your game. In order to ensure that only users you want to test your game (including yourself) can do so, you will need to add users to the “Test Access” list. Click on the “Testing” menu item on the left and then click “Add Testers”. You will need to add the email address that is linked to the Google Play account for any people you want to test your game (including yourself). While the game is in the “Ready to test” state, only these users can access your game’s leaderboard and achievements. Also, while your game is in a pre-published state, you can reset leaderboards and achievement unlocks. This will allow you to test “unlocking” of achievements multiple times. Once your game is published you will not be able to easily reset this data (though it is possible).

Step 5: Create your Game and Test
Now that you’ve set up your Achievements and Leaderboard and have test users ready to go, it’s time to add them to your game!
We won’t go into detail, but you will use a combination of Rules (to control when you unlock achievements and post scores) and the “Platform – Post Score” and “Platform – Update Achievement” behaviors as we have outlined above.
Before using any of those behaviors, you should also make sure the “game.Platform Connected” attribute is true. If it’s not, you should prompt a user to log in to Google Play Games by using the “Platform – Login” behavior.
This “Platform – Login” action may also prompt the user to install or update the “Google Play Games” app, which is required to use Google Play Games services.
Step 6: Configure your Publishing Options
Once you have updated your game you will need to generate an APK to test with. On the GameSalad Publishing Console you will need to configure your game.
First off, you will need to tell us whether your game is using Leaderboards and Achievements.

We have you check each of these separately because we use those options to figure out if we need to run the code to setup each feature. By only selecting what you need, you can avoid the overhead of running unneeded features.
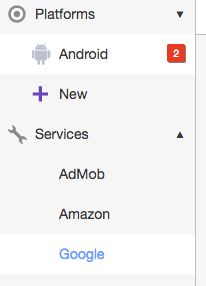
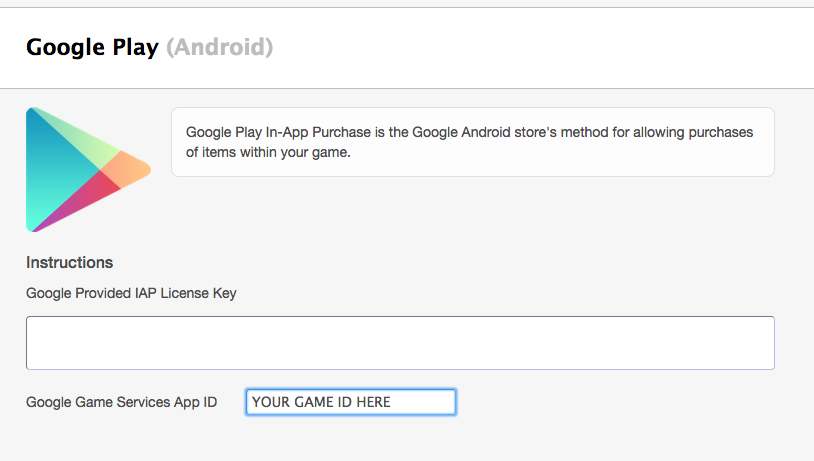
After you’ve checked these features, you will also need to set your App ID. Click on “Google” under “Services”:
You will be shown the Google Play services configuration form. You just need to enter your Game ID here:
Once you’ve done those two things, you can generate your APK for testing.
Step 7: Tidy up and Publish your Game
Once you’ve finished developing your game, you should go back through and make sure you have completed configuration of all Achievements and Leaderboards. Make sure you have descriptions, images. If you want to use “Hidden” achievements, you should set them now as you cannot change them after you “Publish” your game.
Go to the “Publishing” menu item. It will tell if you are missing any information needed to publish your game.
After that, you just need to publish the linked Apps and then change your game from “Ready to Test” to “Publish Game”
