
To transfer your signed .apk file to your device, follow these steps (If you didn’t do the optional steps in the getting started with Android section):
- Open Terminal

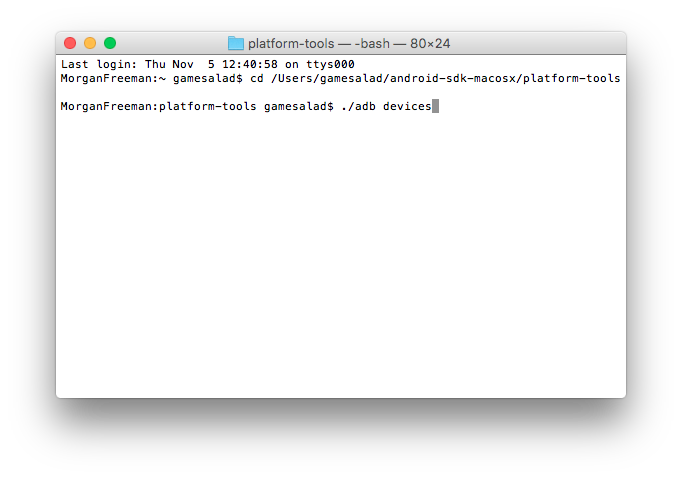
- Navigate to your Android SDK folder (it should be named android-sdk-macosx by default). Inside your Android SDK folder, should be another folder called “platform-tools”

- In Terminal, type “cd” followed by a space, then drag the platform-tools folder into terminal (this will add the path to the location of your platform-tools folder so that you don’t need to type it out) then hit enter

- Terminal should now be looking at the correct place to run adb commands, and you can confirm your device is connected to your Mac using the command “./adb devices”

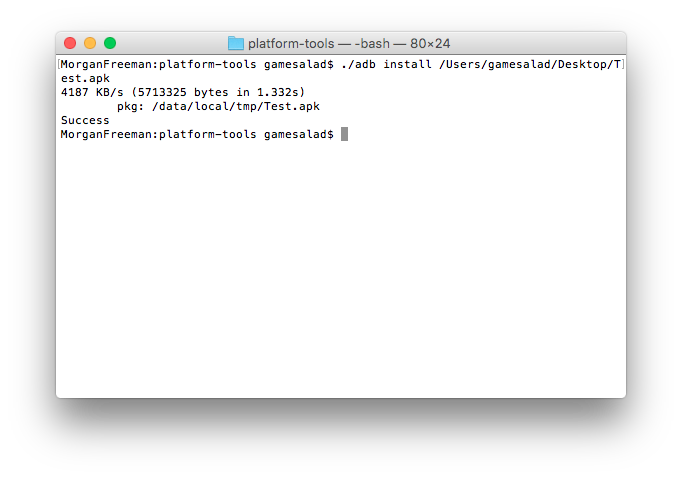
- To install the signed .apk, type the command “./adb install”, followed by a space, then drag your signed .apk file into terminal and hit enter.
To transfer your signed .apk file to your device, follow these steps (if you did the optional steps):
- Open Terminal

- Confirm your device is connected to your Mac using the command “adb devices”

- To install the signed .apk, type the command “adb install”, followed by a space, then drag your signed .apk file into terminal and hit enter.

If you were successful, you should now see your project’s icon on the device and you can launch it for testing!
When you are finished testing, you can uninstall the ad-hoc build the same way you would uninstall any other application from your device.